What Layers to Wear for Backcountry Skiing & Riding
After years of talking about it, I finally took a backcountry snowboarding course and bought a splitboard set up! While it hasn’t been the best winter for snowboarding (in bounds or out!), I have managed to get out a few times. I quickly discovered how important it is to wear and pack the correct layers.

Temperatures can vary wildly throughout a day in the backcountry - you’re likely starting in early morning freezing temperatures; skinning, hiking, skiing, and riding as the day warms up, exerting up a sweat then stopping to assess terrain, and getting back to the car when it has cooled down. That’s a whole range of temperatures to dress for!
Here’s what I recommend that you wear and bring, at a variety of price points:
Base Layer:
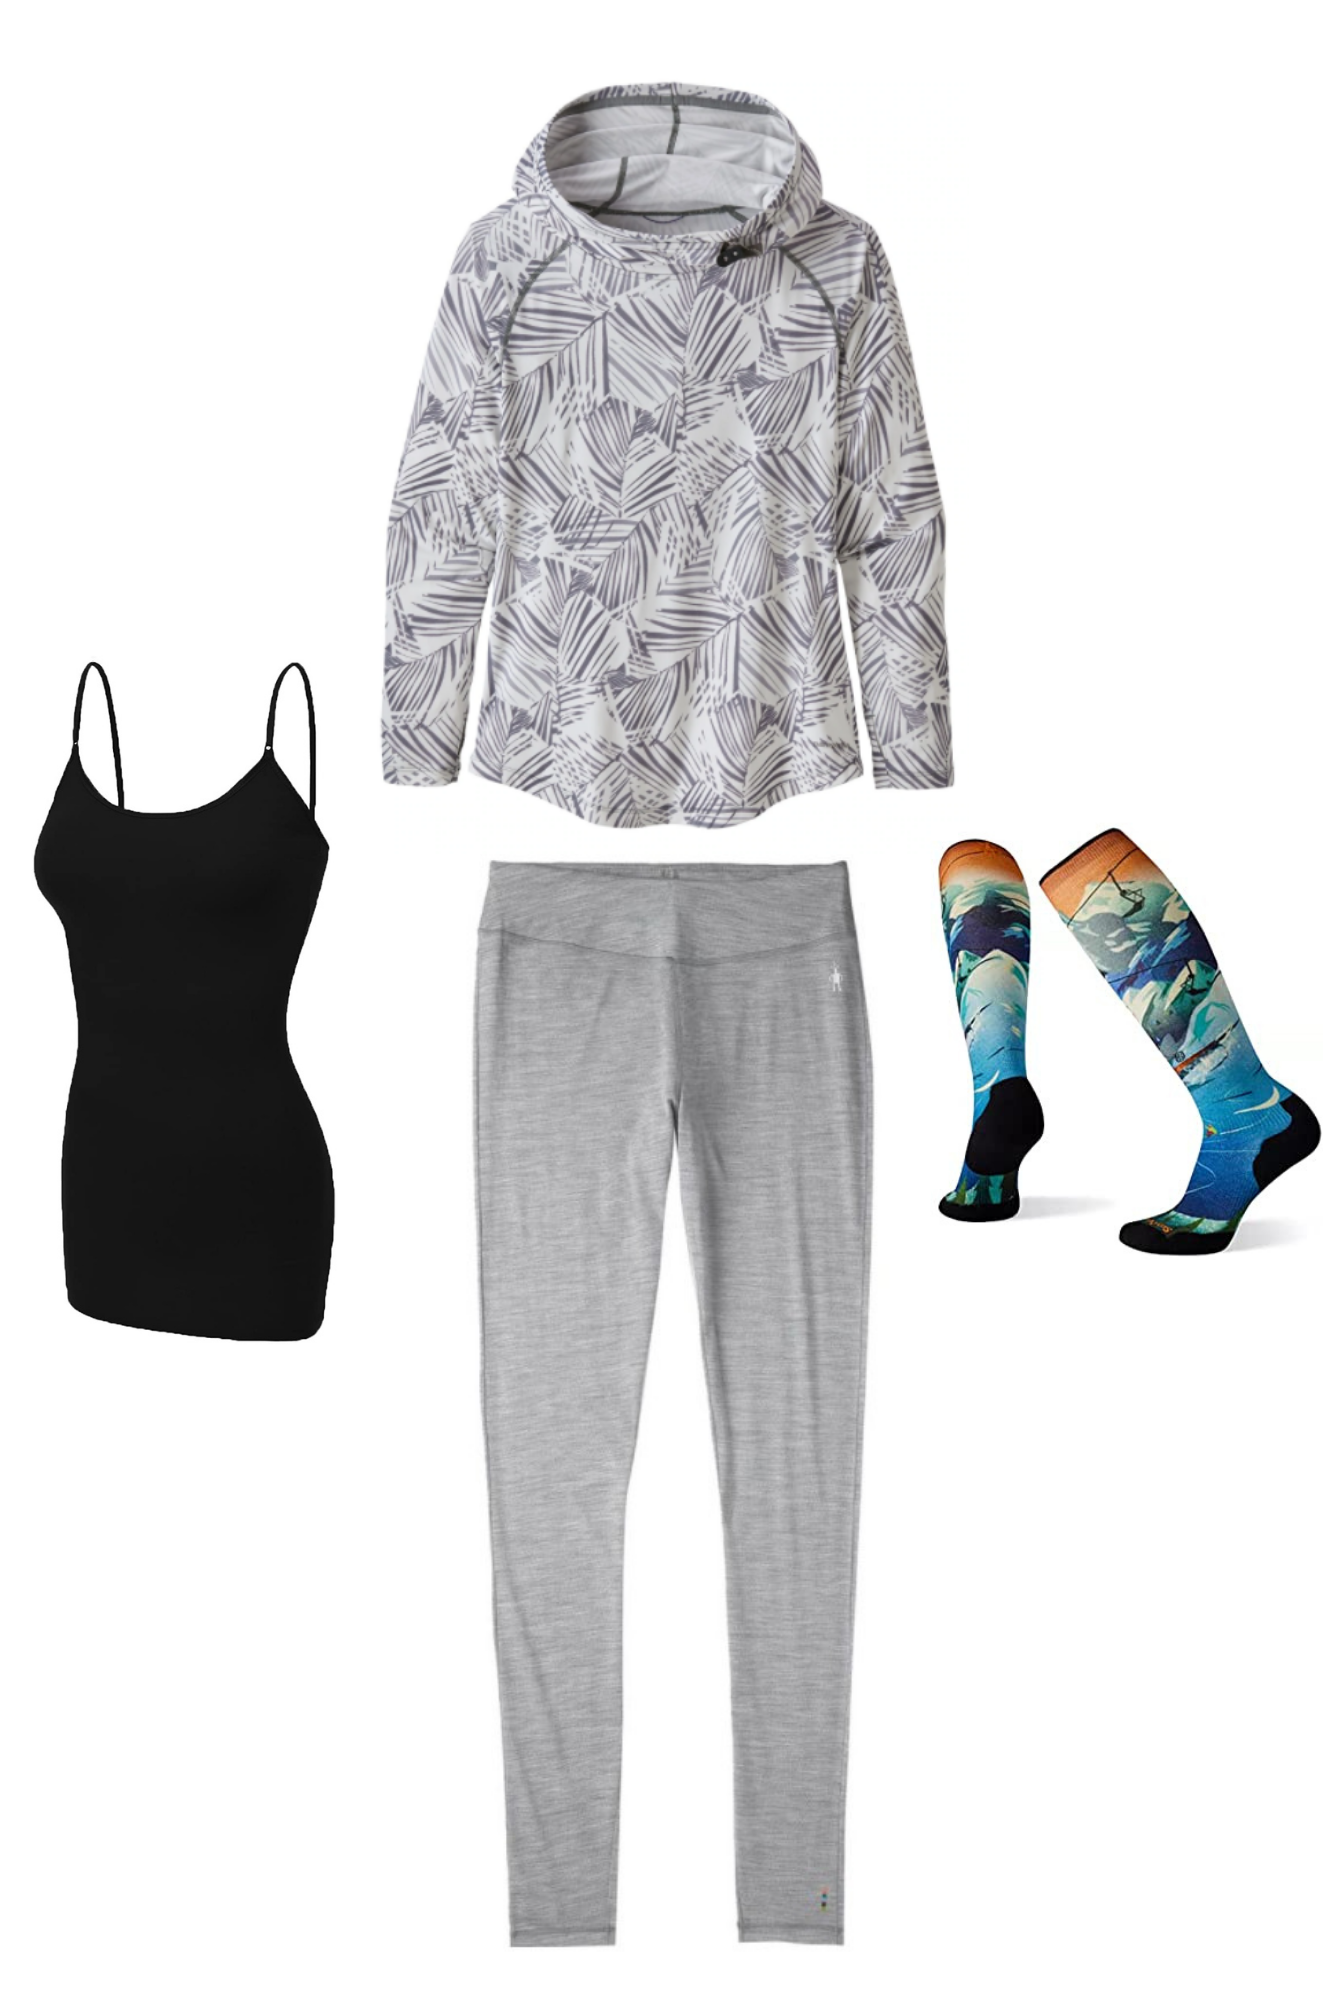
For my baselayer, I think the thinner the better in the backcountry, since you don’t want to get too sweaty from exertion. So I start with a pair of thin but padded ski socks (Smartwool $26 or Icebreaker $17.73), then add a light baselayer (Kari Traa Fryd $27.99, Smartwool Merino 150 $85, REI Co-op $39.95) and long tank top so I can tuck it in to my pants for extra coverage (CRZ Yoga $24, Amazon Basics four tanks for $24.20, prAna locana $44.73). The last part of my base layer is a sun hoody - a top I wear on about 75% of my outings now (Patagonia Capilene Cool Daily Hoody $55, REI Co-op Sahara Shade Hoody $49.99, The North Face Women's Wander Pullover Sun Hoodie $35.71, Mountain Hardware Crater Lake $60).

Outer Layer:
I also tend toward thinner and lighter for the outer layer I start out wearing, including shell pants (Arc’teryx Shaska $399, Patagonia Triolet $349, Marmot EVOdry Torreys $143). Backcountry shell pants tend to be on the pricier side, but you can get away with cheaper waterproof rain pants (REI Co-op Rainier $89.95, Columbia Storm Surge $40.90) they just tend to be less stretchy or breathable. Next, I add a vest (Marmot Jena $150, REI Co-op 650 $80, Mountain Hardwear Ghost Whisperer $149.99) or midlayer (Patagonia R2 Techface $169, La Sportiva Misty $170.73, The North Face Ventrix $199.99), depending on the weather. Finally, I top things off with a windshirt (Columbia Flash Forward $49.99, Patagonia Houdini $99, GoLite ReGreen $59.73). If you don’t have a wind shirt or it’s snowing at the start, this layer can easily be replaced with a rain shell (Marmot Precip $71.01, Patagonia Torrentshell $149, Columbia Arcadia Li $66.75).

Accessories:
I literally never go anywhere without sunglasses, and on a backcountry day, you’re likely dealing with sun reflecting off the snow as well as beating down on you so I wear sunglasses with full coverage (Julbo Monterosa 2 Mountain $229.95, Julbo Tahoe $89.95, Smith Embark $199), and for more sun protection I add a sun hat (REI Co-op Swiftland $26.95, Outdoor Research Helios $28.46, Rise Designs Alpenglow $26). Even if it’s pretty warm out, I wear liner gloves (Dakine Rambler Liner $15.95, CTR Glacier Air Protect, $28.73, Outdoor Research Backstop Sensor $40) on the uphill, to help with grip and in case I fall down, for some extra protection. I also like to wear a lightweight buff, for extra sun protection and in case it gets cold (5-pack synthetic buffs $19.99, Buff Original $14.73, Buff Lightweight Merino $22.95).

Packed:
Since I tend to dress fairly lightly, I pack several extra layers in case it gets cold and/or wet. I bring a decently thick puffy layer (Rab Neutrino Pro Down $375, Patagonia Down Sweater Hoody $279, REI Co-op 650 Down Jacket $49.83, Rab Cirrus Flex $149.95) and a beanie (Carhartt Cuffed Beanie $16.99, REI Co-op Polartec Fleece $14.73, Outdoor Research Drye $24.73) or times when I’ll be standing around, like breaks on the uphill or when surveying conditions. For the downhill, I’ll pack waterproof gloves or mittens (Dakine Lynx Mitts $29.40, Dakine Camino Gloves $25.70, Marmot Spring Gloves $49.73) and goggles (Smith Optics Squad Snow Goggles $120, Zeal Lookout Automatic+ $299, Smith Frontier Snow $50). I also usually end up packing my rain shell.
I’m not an expert, but these are the layers that have worked well for me. Stay tuned for a backcountry snowboarding hard goods list!
Disclosure: Some of the links in this post are affiliate links. If you make a purchase, I receive a small percentage of the sale as compensation – at no additional cost to you. I promise to only recommend products that I use and enjoy!